22 March 2018
Armoured Fist - 7th 'Desert Rats' Armoured Divsion
Today we'll start having a look at some more detail on the formations you can choose from in Armoured Fist. In this article, we'll be looking at the 7th Armoured Division, the Desert Rats.
The 7th Armoured Division became one of the most famous units in the whole war after seeing extensive action in North Africa against the Italian and German forces.
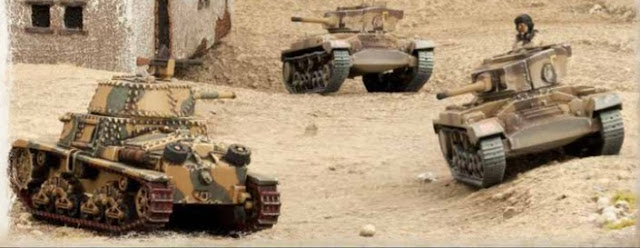
Through the desert campaigns, the differing brigades of the Desert Rats would be equipped with many different weapons including Crusader, Grant and Honey Stuart tanks.
In Armoured Fist, you'll have the option of fielding a number of different formations to represent the Desert Rats.
The Royal Scots Greys
The Royal Scots Greys has a proud history as a cavalry regiment dating right back to the end of the English Civil War through the Napoleonic Wars. At the start of WWII, they were a true cavalry regiment stationed in Palestine and was then reforming into an armoured regiment in 1941, training and honing their skills initially on the Honey Stuart before being equipped with the more powerful Grant.
Fielding the Royal Scots Greys in Flames of War means you're taking a Grant Armoured Squadron. You must field a Grant Armoured HQ consisting of either 2 or 3 Grants tanks. They're pretty well drilled these boys, you're hit on 4+ and they have a Motivation of 4+ as well, although you'd best hope too many don't bite it because your Last Stand is 5+. The Grant does benefit from Protected Ammo though, so you're remounting on a 3+
From that point, you have 2 compulsory choices to make. One of these must be a Grant Troop of 3 Grants. Your second choice could be either another Grant Troop, a Crusader Troop or a Honey Troop. You then have an option of another Grant Troop, should you want to take it (I would!!!)
County of London Yeomanry
You'll have opportunity to field a formation based around the 4th County of London Yeomnary (4th CLY) which was taken from it's sister unit in the 3rd CLY and then assigned under the command of the 7th Armoured Division. In Armoured Fist, you'll be fielding units from either B Squadron or C Squadron, both of which were equipped with the Crusader cruiser tank.
As always, a Formation HQ is your first choice here. You have two options with this one:
1. 2 Crusader II with 2 pdr and 2 Crusader CS with the 3" artillery gun, or
2. 1 Crusader II and 2 Crusader CS
Your compulsory choices then start with a Crusader Troop. You do have a choice to make here because you can take either a Crusader II Armoured Troop with 3 Crusader II tanks armed with 2 pdr guns OR you can take a Crusader II & II Troop which you can build with either 1 Crusader II and 2 Crusader III tanks or vice-versa.
The Crusader crews are a little more gung-ho than their brethren in the Grant so they have a To Hit rating of 3+. They have the same Motivation and Last Stand as the Royal Scots Greys but when it comes to skill, they need to get into Jerry's face quick smart! This is represented by the Tally Ho rule which gives them faster speed at the expense of tactics. Not a bad trade off....
Your second compulsory choice can then be either another Crusader Troop or you can add a Grant Troop for some heavier power.
Finally, you have the option for an additional three Crusader Troops to round out your formation.
The 8th King's Royal Irish Hussars
Another unit with an illustrious history, the 8th Hussars can trace their unit's lineage all the way back to the 17th Century and was also one of the units to participate in the Charge of the Light Brigade in the Crimean War...obviously not in Honey Stuarts though!
As you may have guessed, taking the 8th Hussars means you'll be fielding a Honey Armoured Squadron. These little tanks are quick and if they get into the sides of those pesky Panzers, the 37mm gun packs enough punch to deal with them!
Your Squadron HQ allows you to field either 3 or 4 Honey tanks. The are very similar to the 4th CLY in that they're hit on a 3+ and have a 4+ Motivation/5+ Last Stand. Much like the Crusaders, you want to get these in FAST, and so at the sacrifice of some skill, you move faster... 12" Tactical or 16" over terrain.
You have to take at least 1 Honey Troop consisting of 3 tanks. Your second choice, again like the 4th CLY, can either give you another Honey Troop or a Grant Troop for some heavy support.
The formation can then be rounded out with up to 2 more Honey Troops.
The Royal Wiltshire Yeomanry
Whilst not technically part of the 7th Armoured Division, I have included the Royal Wiltshire Yeomanry here to have a look at. In Armoured Fist, they're based on A Squadron of the 9th Armoured Brigade, 2nd NZ Division at El Alamein.
What's that mean? It means Shermans!
So, into the formation. You'll need an HQ which in this case consists of between 2 and 4 Sherman tanks. The tankers in the Shermans are a little more careful with their tanks so they're hit on a 4+. They maintain the Motivation 4+/Last Stand 5+ of the other British tank units though.
Into your compulsory selections, you've first got to take a Sherman Armoured Troop. Here, you have 2 options. You can either tank a Troop of 3 Shermans or you can mix it up and take a Troop with a Grant and 2 Shermans. This is representative of 3 Troop being armed with Grants at El Alamein.
You other compulsory choice can be another of the above or you can choose either:
- A Grant Armoured Troop,
- A Crusader Armoured Troop,
- A Honey Armoured Troop or,
- A Churchill III Armoured Troop (which we'll cover in the next article...)
From there, you have another optional slot which can be either a Sherman or Grant Armoured Troop and a final optional slot which can be Shermans.
This has the potential to get some pretty well rounded arsenal on the table, depending on what points you're playing.
So that's gonna do it for the Desert Rats and our extra special guests. Next time, we'll be taking a look at the 78th 'Battleaxe' Division. Churchills!!!!
10 March 2018
Back into the Desert - Armoured Fist Review
With the latest volume for Flames of War Mid-war, we're back on to the Allied side of the ledger and now look at some more of the British Forces that fought in North Africa, this time the tank forces in support of the 8th Army.
Armoured Fist is going to allow you to field formations from the following:
7th 'Desert Rats' Armoured Division
- The Royal Wiltshire Yeomanry fielding the mighty Sherman.
- The Royal Scots Greys and their Grant's.
- The County of London Yeomanry fielding varying Crusader models, and
- The 8th Hussars and their Honey Stuarts.
6th 'Mailed Fist' Armoured Division
- 'Death or Glory' squadron comprising various tanks including Valentines and Crusaders.
78th 'Battleaxe' Division
- The North Irish Horse fielding the heavy Churchill tank
- The 40th (The King's) RTR and their Valentines
- The Rifle Companies of the Argyll and Sutherland Highlanders
You'll also have access to support options for all formations to cover you in terms of air support, artillery support and other facets of combined arms.
As we've come to expect from these volumes from Battlefront, they're decked out with fantastic colour shots of the forces in action as well as a bunch of historical information on the battles in the desert such as Gazala and the Battles of El Alamein.
Each of the different parts of the Divisions listed above allows you to field formations of specific British or American tanks in British service to suit your taste. From there you can select your support options as you'd expect.
If, for instance, you wanted to take a force of the might Churchill III (and with the coming plastic kits from Battlefront, why wouldn't you?!), then you're immediately looking at a North Irish Horse force to take these monsters.
While I won't be looking at each of the individual units in this article, I am going to take a look at what I think is my favourite; the Death and Glory Boys of the 17th/21st Lancers.
Like most other formations as part of V4 Flames of War, you have some compulsory choices to make here.
Your formation HQ can be made up of either:
- A Valentine III HQ with either 1 or 2 Valentine III tanks supported by 2 Crusader CS in both instances, or
- A Lee HQ with 3 Lee tanks.
From there, you must take:
- A Valentine III Death or Glory Troop of 3 Valentine III tanks, and
- A Crusader III Death or Glory Troop of 3 Crusader III tanks.
From there you have 2 more optional slots which you can fill with an additional Valentine III squadron or either another Valentine Squadron or another Crusader III Squadron.
I think the thing that excites me most about this one is the nature of how you play them. You just get straight up into your opponents grill with fast tanks like the Crusader while the highly armoured Valentines roll in behind to mop up.
You have to get them in there quick because they're Aggressive, meaning they're hit on a 3+ and while they have relatively good armour, you still need to make sure you have a few that make it through.
With a few carefully selected support choices, you really have the makings of a great force!
So, there's your introduction to Armoured Fist. Over the next few articles, we'll delve a bit deeper into some of the other forces at your disposal.
And don't forget.....the like it up 'em.
Subscribe to:
Posts (Atom)


